How to Format a USB Drive on Mac Without Losing Important Files
When your USB drive refuses to open on a Mac or displays a “RAW” message, formatting usually sorts things out quickly. Just remember, if it’s not performed properly, you might lose your data, or have to reformat the flash disk again, which would just waste your time.
Thus, it’s necessary to learn how to format USB on Mac, properly. In this guide, you’ll find out what to do before formatting the drive on your Mac, and how to do it correctly. You’ll also learn what to do if you need to recover important data from the flash disk before or after formatting.
Key Takeaways
- Back up or recover your files before formatting, as formatting can erase your USB drive’s data.
- Choose the right file system (APFS, HFS+, exFAT, or FAT32) based on how you’ll use the drive.
- Use Disk Utility or Terminal to safely format a USB drive on your Mac.
- Run First Aid first if the USB is corrupted or won’t format, then reformat only if necessary.
- If you format the wrong drive, stop using it immediately and recover your files with data recovery software before they’re overwritten.
Part 1. Why You May Need to Format a USB on Mac
When you format USB on Mac, it wipes its existing file system and creates a new one so macOS (or another device) can use it properly. It’s essentially a fresh start for the drive, erasing all existing data. Here are the popular reasons why users format a USB drive on a Mac:
- The USB drive isn’t recognized by macOS: It shows up in “Disk Utility” but not in “Finder,” or doesn’t appear at all, often because it was formatted with a file system macOS doesn’t fully support, such as NTFS.
- The drive needs to function across Windows and Mac: A flash drive formatted purely for Mac (APFS or Mac OS Extended) can be unreadable on a PC, and vice versa.
- The USB has become corrupted or unreadable: Improper ejection, power interruptions, or file system errors can leave a drive showing as “RAW” or prompting you to format it before you can use it.
- You’re prepping the drive for something specific: A clean file transfer, a “Time Machine” backup destination, or bootable installation media for macOS or another OS.
Important Info: Formatting permanently deletes everything on the drive. Therefore, back up or recover any important files before proceeding.
Part 2. What Happens When You Format a USB Drive on Mac
Formatting removes your files from view. But whether they’re permanently erased depends on the type of format:
- A quick format (the default in Disk Utility) deletes the file system’s index and marks the space as available, but the actual data remains until it’s overwritten.
- A full format or secure erase overwrites the drive’s storage, making old data much harder or impossible to recover.
This is why files are often recoverable after a quick format, as the data usually remains on the drive until new files replace it. You can use USB retrieval software like 4DDiG USB Data Recovery, which is designed to recover files from formatted or deleted USB drives, external drives, and memory cards.
But the important thing is to stop using the drive immediately. If your files are important, recover them before formatting, not after. Here are a few things worth knowing about 4DDiG:
Main Features of 4DDiG:
- Can recover data even when a USB drive shows as “no media” or “RAW” and macOS prompts you to format it.
- Supports recovery across 2,000+ file formats, including photos, videos, Office documents, audio, and compressed archives.
- Supports USB flash drives, external HDDs and SSDs, SD/microSD/CF cards via card readers, and USB mass storage devices such as cameras and dash cams.
- Lets you preview recoverable files before committing to a restore, so you’re not guessing at file quality.
- Uses read-only scanning, meaning the scan itself doesn’t write to or further damage the drive.
Step-by-Step Guide to Use 4DDiG:
Here’s how to retrieve data from your USB drive with 4DDiG before formatting:
Step 1: Install the Recovery Tool
Install 4DDiG on your computer. Then, connect the USB drive to your Mac.
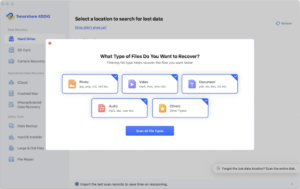
Step 2: Select a Location
4DDiG will detect the USB automatically. Select it from the list of available drives to begin a scan. You can choose selective file types to scan.
Step 3: Scan and Preview
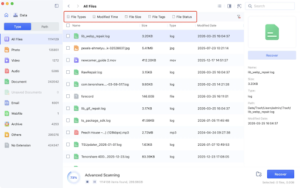
Let the scan run to completion, then use the preview feature to check that recovered photos, documents, or videos are intact before restoring anything. You can search for particular files with keywords and filter tags.
Step 4: Recover from USB Drive
Restore the files you need to a different drive or folder. Never save them back to the same USB you’re recovering from, since those risks overwriting the very data you’re trying to save.
Part 3. Things to Check Before Formatting
Once your files are safely copied elsewhere, here are a few quick checks before you open Disk Utility for formatting. These are necessary to avoid making a formatting mistake later on:
Check 1. Verify the USB Is Detected in Finder or Disk Utility
Plug in the USB drive and check if it appears in Finder. If it doesn’t, open “Disk Utility” from “Applications” > “Utilities.” Enable “View” > “Show All Devices.” Check this out:
- If the drive appears in “Disk Utility” but not “Finder,” the file system is likely corrupted or unsupported, and formatting may fix it.
- If it doesn’t appear in “Disk Utility” either, the problem is more likely a hardware or connection issue.
Check 2. Back Up Existing Files
If the drive is detected and its files are still accessible, drag anything you need onto your Mac’s desktop, an external drive, or a cloud folder before you format. This is the simplest and fastest safeguard. Recovery software is a fallback for when this step wasn’t possible, not a substitute for it.
Check 3. Choose the Correct File System
macOS gives you a handful of format options in Disk Utility, and picking the right one up front avoids having to reformat again later:
- APFS: Best for Mac-only use on macOS High Sierra (10.13) or later.
- Mac OS Extended (HFS+): Ideal for older Macs or Time Machine backups.
- exFAT: Best for drives used on both Mac and Windows. Supports large files.
- FAT32 (MS-DOS FAT): Offers the widest compatibility with older devices but limits files to 4GB.
Rule of thumb: Use APFS or Mac OS Extended for Mac-only drives, and exFAT if you need compatibility with both Mac and Windows.
Part 4. How to Format USB on Mac (Step-by-Step)
The following are step-by-step instructions to format your USB drive. These range from a straightforward method to an advanced one, depending on whether you want more control or the USB is displaying formatting errors:
Fix 1. Format USB Using Disk Utility
Rather than using a quick format, formatting the USB drive in Disk Utility offers a complete process that fixes bad sectors and performance issues. Here’s how to format USB drive on Mac with Disk Utility:
Step 1: Connect the USB drive, then open “Disk Utility.”
Step 2: Click “View.” Choose “Show All Devices” to display the full physical disk, not just its volume.
Step 3: Select the USB drive in the sidebar and click “Erase.” Enter a name for the drive. Next, choose a format:
- APFS
- Mac OS Extended (Journaled)
- exFAT
- MS-DOS (FAT)
Step 4: Choose a scheme:
- GUID Partition Map for modern Macs.
- Master Boot Record (MBR) if the drive also needs to work with Windows PCs.
Step 5: Hit “Erase” and wait for the process to finish. Do not disconnect the drive or let your Mac sleep during formatting.
Step 6: Click “Done” when prompted. Your USB drive is now reformatted and ready to use.
Fix 2. Format USB on Mac Using Terminal
If the USB drive isn’t formatting properly in Disk Utility, or you want to script the process, Terminal gives you more control. Here’s how to format USB on Mac in Terminal:
Step 1: Open “Terminal” from “Spotlight.” Run the following command to view connected disks and identify your USB drive by its size and identifier (e.g., /dev/disk4):
- diskutil list
Step 2: Double-check the identifier. Formatting the wrong disk can erase your main drive. Next, unmount the drive by running the following command:
- diskutil unmountDisk /dev/diskX (Here, replace diskX with your USB drive’s identifier).
Step 3: Format the drive using the following command:
- sudo diskutil eraseDisk ExFAT USBDRIVE GPT /dev/diskX//ExFAT = file system (replace with JHFS+ for Mac OS Extended or FAT32/MS-DOS (FAT) as needed).
//USBDRIVE = the drive name.
//GPT = GUID Partition Table scheme.
Step 4: When the process finishes, run “diskutil list” again or check “Finder” to confirm the USB drive is mounted with its new name and format.
Fix 3. Reformat an Unreadable or Corrupted USB
If your USB shows up but throws errors, appears as RAW, or won’t mount at all, try repairing it first with “First Aid” before wiping it outright. Here’s how:
Step 1: Connect the USB drive to your computer. Next, open “Disk Utility.” Then, select the USB drive, and click “First Aid.”
Step 2: Let “First Aid” scan for and repair file system and directory errors. If the repair succeeds, check whether the drive mounts normally. You may not need to format it.
Step 3: If First Aid fails or reports unrepairable errors, the file system is likely too damaged, and reformatting is usually the only dependable solution.
Part 5. What to Do If You Accidentally Formatted the Wrong USB
Formatted the wrong USB drive, or realized after the fact that it had files you needed? Here’s the damage-control sequence:
- Stop Using the Drive: Don’t open, browse, or copy files to the USB.
- Prevent Overwriting: Avoid writing new data, as it can overwrite recoverable files.
- Scan the USB: Use 4DDiG USB Data Recovery to perform a deep scan after a quick format.
- Preview Files: Check recoverable files to ensure they’re intact before restoring them.
- Restore Safely: Recover files to your Mac, another external drive, or cloud storage, and never back to the formatted USB.
Part 6. Why Mac Won’t Let You Format a USB (And How to Fix It)
Sometimes the USB format process itself stalls or throws an error. A few popular reasons for this are as follows:
- Fix read-only issues: Check for a physical write-protect switch (common on older flash drives). If there isn’t one, unmount and reconnect the drive, then try formatting again.
- Run First Aid: Use “Disk Utility” > “First Aid” to repair file system errors that may be preventing the drive from formatting.
- Force format via Terminal: If “Disk Utility” fails or the “Erase” button is unavailable, use the “diskutil eraseDisk” command in “Terminal” to format the drive.
- Check for hardware failure: If the drive isn’t detected on multiple computers, disconnects repeatedly, makes unusual noises, or formatting always fails, it may be physically damaged. But if it’s still detected, try recovering your data before replacing it. In case no computer detects it, professional recovery or replacement is usually the only option.
Part 7. Best Practices to Prevent USB Data Loss
A little discipline around how you use USB drives goes a long way toward avoiding a formatting emergency in the first place:
- Eject USB Drives Safely: Always use Eject in Finder before unplugging a USB drive, especially during file transfers.
- Back Up Important Files: Keep regular backups. USB drives are best used for temporary storage, not long-term archives.
- Choose the Right File System: Select the appropriate format before erasing to avoid reformatting later.
- Check for Disk Errors: Run “Disk Utility” > “First Aid” periodically, especially on frequently used drives.
- Recover Data Before Formatting: Recover important files first, as formatting may make recovery more difficult.
- Don’t Interrupt Formatting: Avoid unplugging the drive, closing your Mac’s lid, or letting it sleep while formatting is in progress.
Final Words
Learn how to format USB on Mac only after backing up or recovering any important files. Then use Disk Utility or Terminal to format it with the file system that best fits your needs. While formatting is often the best fix for a corrupted or incompatible drive, it permanently removes the existing file system.
If you’re unsure whether the drive contains important data, scan it with 4DDiG USB Data Recovery before formatting. Even after a quick format, the tool can retrieve data, as long as you stop using the drive immediately.